Your kit and your set-up
Your kit and your set-up
The Grafwood row, the Blackwing point, the kneaded eraser, a board, and a light from the left
Lay out the kit you own, cut your first long points, and arrange a drawing place that makes you draw from the shoulder.
- Difficulty
- Time
- about 0.5 h
- You draw with
- Grafwood tin (4H to 9B) and the Pitt Matt tin (HB to 14B), Alpha sketchbook and copier paper
Why this one
- Unit 0 of the program: Before the First Mark.
- Three pencils with long points.
- A board you want to sit at.
From your kit
The whole kit →- 1Grafwood 4H, HB, 9B 4H, HB for layout and line; 9B for the darks. Long points from the Blackwing on everything up to B.
- 2Kneaded eraser and the Mono Zero press-and-lift corrections only; the Mono Zero for a single sharp light.
- 3Alpha sketchbook 9 x 6 draw at the book's size and keep the proportions; date the page.
In general, this study asks for
- Grafwood tin (4H to 9B) and the Pitt Matt tin (HB to 14B)
- Blackwing One-Step sharpener, a craft knife, any 220-grit square
- Kneaded eraser and a Mono Zero
- Alpha sketchbook and copier paper
- A board and two clips
- A lamp
Watch first
All videos →Tripod and overhand grips, and drawing from the shoulder. Watch before Foundations session 1.
YouTube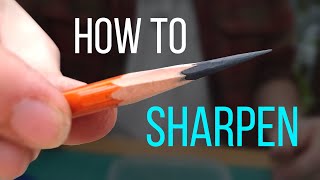

The plan
6 stages · ~45 min- 1
Lay out the grades
8 minWith the Grafwood row laid out 4H to 9B, make a dark swatch with each on a scrap of copier paper, pressing as hard as you comfortably can, then the same with the Pitt Matt row underneath. Look at the two rows. The 4H refuses to go dark. The 9B goes nearly black with almost no effort, and the Pitt Matt 14B goes blacker still without shining. That difference is the whole reason for having grades, and from now on you will reach for a softer pencil when you want darker, never press harder.
FigureWhat each grade can honestly do. Checklist0 / 1 - 2
Cut a long point
8 minRun the Grafwood 2H, H, F, HB and B through the Blackwing One-Step: one pass each, and look at the long point it gives you, eight to ten millimetres of lead. Now take the 2B, which is too soft for the helix. Hold it in your off hand, the craft knife in your drawing hand, blade angled away from you. Shave the wood in long strokes toward the point, turning the pencil a quarter turn after each stroke. Do not touch the lead with the blade. Stop when eight to ten millimetres of lead are exposed, then roll the lead on a 220-grit square to taper it.
Knife-sharpen the 4B and the Pitt Matt 8B the same way. Every soft pencil from now on gets the knife; every hard one gets the Blackwing.
TipIf the lead snaps, you were pressing the blade on it. Shave only wood.
FigureShave wood, shape lead on the block. Checklist0 / 1 - 3
Set the board
8 minClip a sheet of copier paper to your board. Prop the board at about twenty-five degrees: on a thick book, against a box, anything. Put your lamp so the light comes from the side opposite your drawing hand. Sit back so your arm is nearly straight when the pencil touches the middle of the page. Put a second sheet under the heel of your hand as a slip sheet.
FigureTilted, lit from the left for a right-hander, arm's length. Checklist0 / 1 - 4
Try both grips
8 minHold the 2B in the tripod (writing) grip, but an inch and a half further back than you hold a pen. Draw a few short lines. Now turn the pencil under your palm into the overhand grip, lay the side of the lead on the paper, and sweep a few wide strokes from the shoulder. Feel how different they are. You will use both in every drawing.
FigureOverhand: side of the lead, from the shoulder. Checklist0 / 1 - 5
Fill one sheet
8 minWith the overhand grip and the 2B on its side, cover a sheet of copier paper with tone, any way you like, for five minutes. It will be streaky and uneven. That is the point: it shows you what the drills in the next unit will fix. Date it, put it in the box.
FigureYou will see the paper's grain through the tone. Good. Checklist0 / 1 - 6
Self-check
5 minTick each item honestly. If one is a no, the session is not finished; go back to that step.
Checklist0 / 4
What it should look like
- Three pencils with long points.
- A board you want to sit at.
- A streaky sheet of tone in the box.
Where it goes wrong
- Sharpening the lead to a needle and snapping it on the first stroke. Too fine a taper for a soft pencil. A gentler taper on the sandpaper. Soft pencils want a slightly blunter point.
- The lamp in front of you. Your hand shadows every line you draw. Move it to the side opposite your drawing hand.
Log this session
Start the clock when you pick up the pencil. Stop it when you put it down. Log it. Every session counts toward the box.
Status
How did it go?