The first page
The first page
A value scale and an honest baseline drawing to keep forever
Make your first nine-step value scale and a baseline drawing of a simple object, so that later progress has something to be measured against.
- Difficulty
- Time
- about 1 h
- You draw with
- 2H, HB, 2B, 4B, 6B
Why this one
- Unit 0 of the program: Before the First Mark.
- Nine steps, roughly even, from paper to near-black.
- A mug or box with a lit side, a shadow side and a cast shadow, however rough.
From your kit
The whole kit →- 1Grafwood 2H, HB, 2B, 4B, 6B 2H, HB for layout and line; 2B, 4B, 6B for the darks. Long points from the Blackwing on everything up to B.
- 2Kneaded eraser and the Mono Zero press-and-lift corrections only; the Mono Zero for a single sharp light.
- 3Alpha sketchbook 9 x 6 draw at the book's size and keep the proportions; date the page.
In general, this study asks for
- Drawing pad
- 2H, HB, 2B, 4B, 6B
- Kneaded eraser
- A mug or a small box
- Lamp
Watch first
All videos →Squinting, value scales and why beginners under-read darks.
YouTube How to simplify your light and shadow shapesDrawing Tutorials Online · Shadow shapes as flat masses first. Shown on a portrait, but the principle is identical for a tree or a tower.
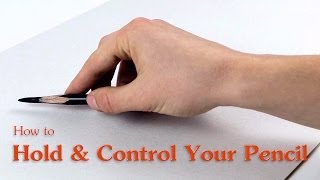 How to hold and control your pencilProko · Tripod and overhand grips, and drawing from the shoulder. Watch before Foundations session 1.
The plan
6 stages · ~50 min- 1
Draw the nine boxes
9 minWith the 2H and a ruler (the one time a ruler is allowed), draw a row of nine boxes, each about an inch square, across the top of a drawing-pad sheet. Number them 1 to 9 underneath. Box 1 stays as bare paper. Box 9 will be as dark as the 6B can go.
FigureThe target. Yours will be rougher. That is fine. Checklist0 / 1 - 2
Fill the ends first
9 minFill box 9 with the 6B, layering until it is solid and even. Then fill box 5 with the 2B to what looks like exactly halfway between paper and box 9. Squint to check. Then 3 (between 1 and 5) and 7 (between 5 and 9). Then the rest. Working from the ends inward keeps the steps even; working left to right makes the top end cramp.
TipUse layers, not pressure. Each box should be matte, not shiny.
Checklist0 / 1 - 3
Check and label
9 minHold the sheet at arm's length and squint. Where two neighbours look the same, darken the higher one slightly. Where there is a jump, lighten. When it is as even as you can make it, write under each box which pencil did most of the work. This is your pencil map. Pin it beside the board; you will refer to it for months.
Checklist0 / 1 - 4
The baseline drawing
9 minPut a mug or a small box on the table under your lamp. On the lower half of the same sheet, draw it. Take twenty minutes. Try to show which side is lit and which is in shadow, and where its shadow falls on the table. Do not worry about how it looks. This drawing exists to be compared with the one you will make in the capstone unit.
FigureLight side, shadow side, cast shadow. Just those three. Checklist0 / 1 - 5
Date it, box it
9 minWrite the date and Baseline in the corner. Put it in the box. Do not look at it again until the course tells you to.
Checklist0 / 1 - 6
Self-check
5 minTick each item honestly. If one is a no, the session is not finished; go back to that step.
Checklist0 / 4
What it should look like
- Nine steps, roughly even, from paper to near-black.
- A mug or box with a lit side, a shadow side and a cast shadow, however rough.
Where it goes wrong
- Boxes 1 to 5 are fine and 6 to 9 are all the same dark. The hand does not yet know how to make the dark halftones. Rebuild 6, 7 and 8 using layers of 4B, counting the layers: two, three, four.
- Shiny boxes. Pressure instead of layers. Lighter touch, more passes, change direction each pass.
Log this session
Start the clock when you pick up the pencil. Stop it when you put it down. Log it. Every session counts toward the box.
Status
How did it go?