Flat tone and the smooth gradient
Flat tone and the smooth gradient
A square that looks like grey paper, and a ramp built from layers
Lay an even field of tone with no rows or dark stroke-ends, then build a gradient from stacked flat layers.
- Difficulty
- Time
- about 0.5 h
- You draw with
- 2B, 4B
Why this one
- Unit 1 of the program: Instrument Control.
- A square you would believe was grey paper.
- A gradient with no bands when squinted.
From your kit
The whole kit →- 1Grafwood 2B, 4B 2B, 4B for the darks. Long points from the Blackwing on everything up to B.
- 2Kneaded eraser and the Mono Zero press-and-lift corrections only; the Mono Zero for a single sharp light.
- 3Alpha sketchbook 9 x 6 draw at the book's size and keep the proportions; date the page.
In general, this study asks for
- Drawing pad
- 2B, 4B
Watch first
All videos →All six mark families in one sitting.
YouTube

The plan
5 stages · ~45 min- 1
The two-inch square
10 minDraw a two-inch square lightly with the 2H. Fill it with the 2B on its side: strokes that overlap by half, pencil lifting off at the end of each stroke like a plane taking off. Cover the whole square in one direction. Then a second layer at a different angle. Squint. If rows show, a third layer at a third angle. Aim for a square that could be a piece of grey paper glued on.
FigureOverlap by half, feather the ends, change direction. Checklist0 / 1 - 2
Bigger, then with edges
10 minA four-inch square the same way. Then a square with a hard edge on the left (tone goes right up to the line) and a soft edge on the right (tone fades out over half an inch). You will need both kinds of edge in every landscape.
Checklist0 / 1 - 3
The layered gradient
10 minA band two inches tall and eight long. Layer one, light 2B, covers all of it. Layer two starts a quarter of the way along. Layer three starts halfway. Layer four, 4B, covers the last quarter. Each layer in a different direction. Squint: a smooth ramp with no bands. This is how skies, cast shadows and every turning form are made.
FigureFour flat layers that start at different places. Checklist0 / 1 - 4
Look at a master gradient
10 minPiranesi's Pyramid of Cestius is one enormous gradient with texture laid on top of it. Follow the face of the pyramid from its lit edge into shadow and notice there is no band anywhere.
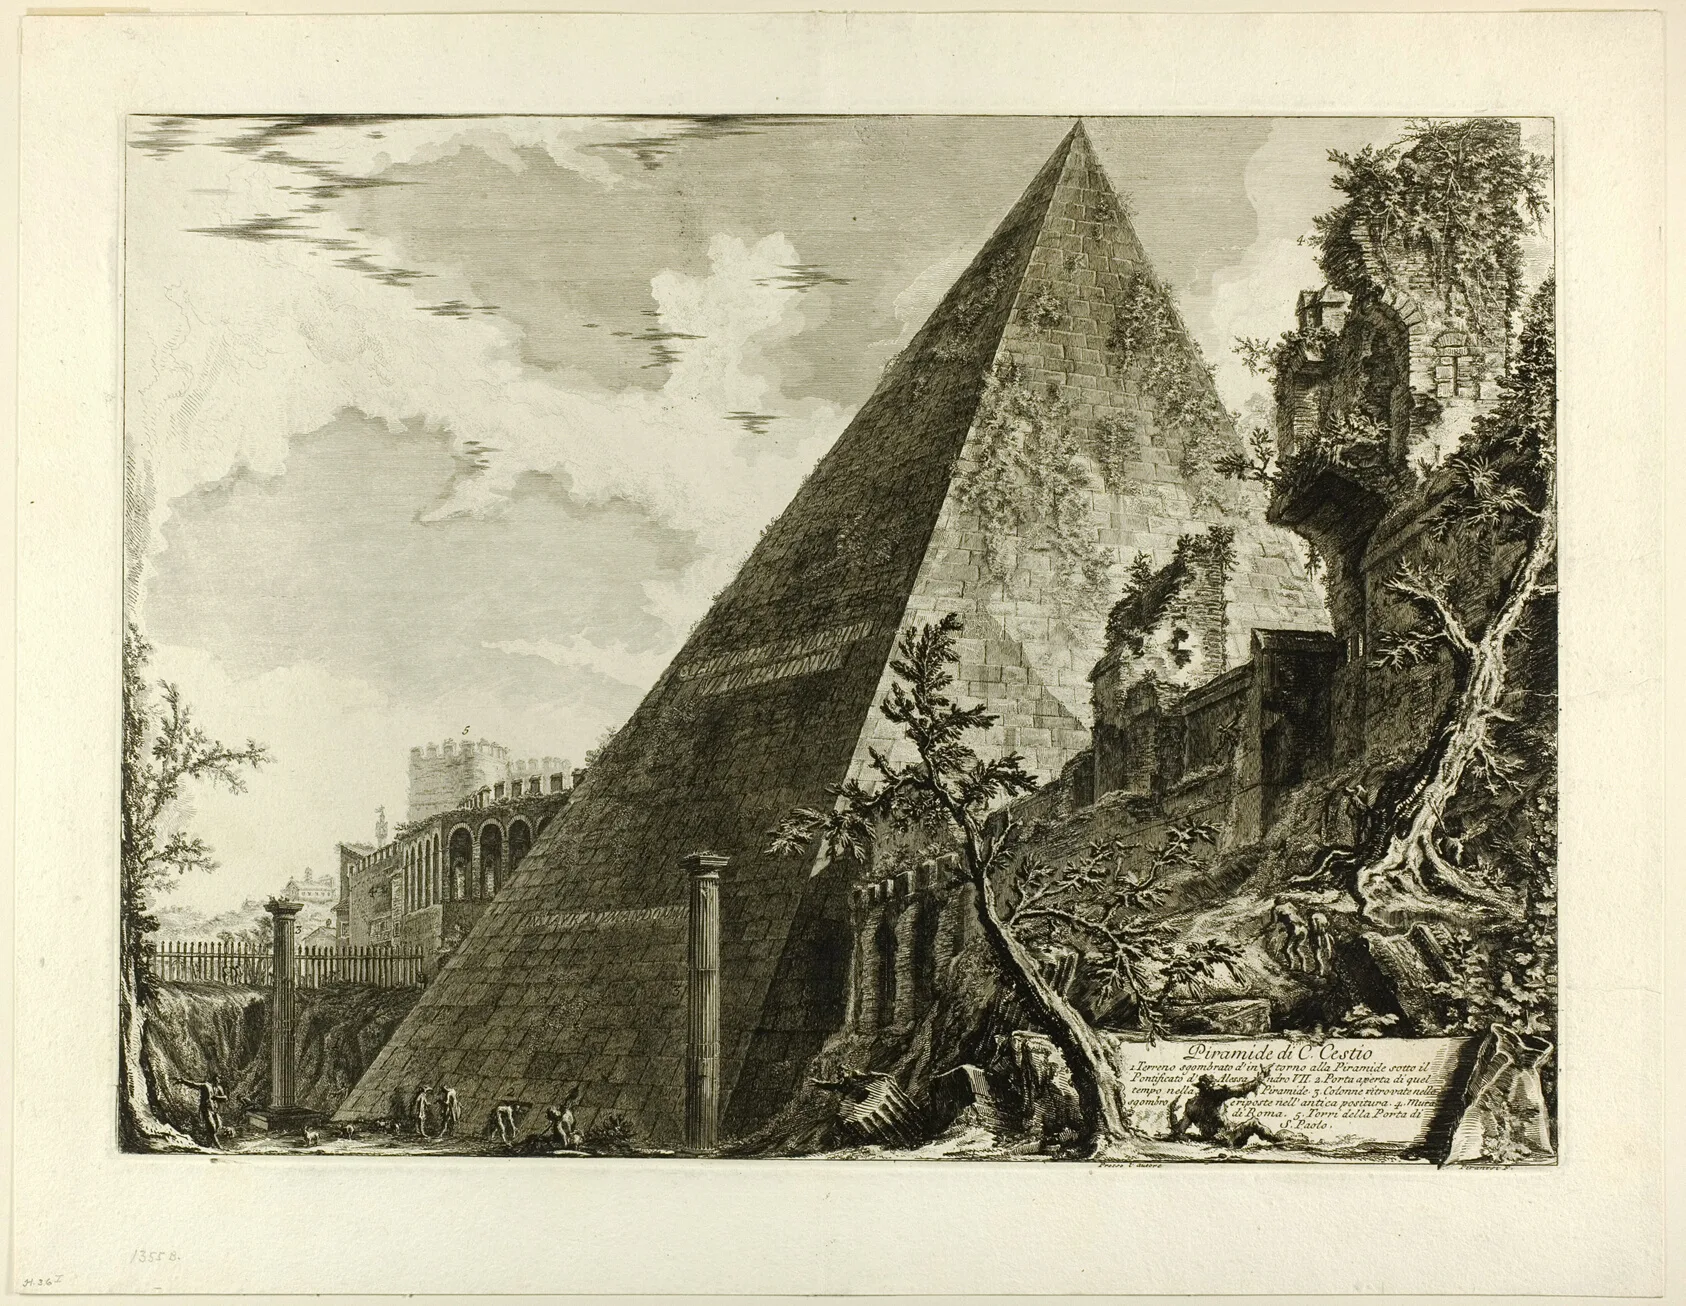
Piranesi, The Pyramid of Gaius Cestius, from Views of Rome, 1750/59, published 1800–07. Etching on heavy ivory laid paper.
Piranesi, The Pyramid of Gaius Cestius. One plane, one gradient, no bands.
The Art Institute of Chicago · The Charles Deering Collection
Checklist0 / 1 - 5
Self-check
5 minTick each item honestly. If one is a no, the session is not finished; go back to that step.
Checklist0 / 3
What it should look like
- A square you would believe was grey paper.
- A gradient with no bands when squinted.
Where it goes wrong
- A dark line at the end of every stroke. The pencil stopped dead on the paper. Lift as you finish. Practise the take-off on scrap.
- The gradient has four visible steps. Layers too dark and too sharply started. Lighter layers, and feather the start of each one over an inch.
Log this session
Start the clock when you pick up the pencil. Stop it when you put it down. Log it. Every session counts toward the box.
Status
How did it go?